

Blog
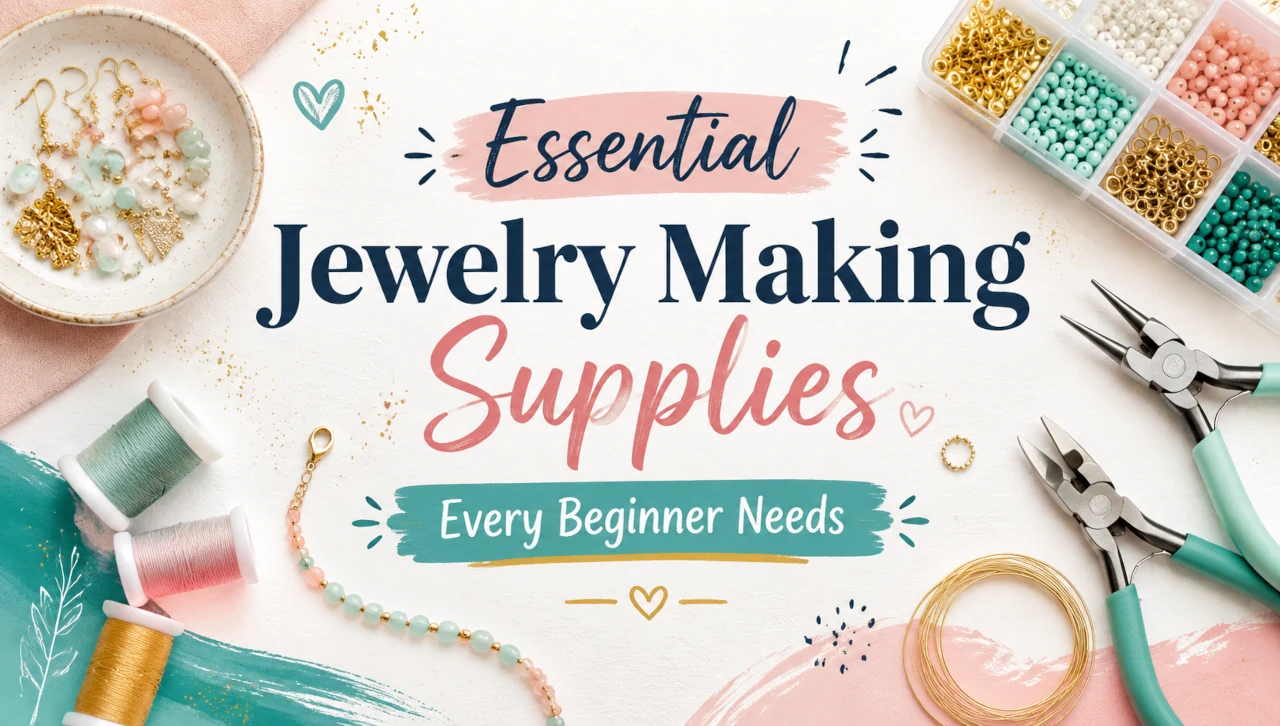
Jewelry Making Supplies Every Beginner Needs
Introduction: Start Your DIY Jewelry Journey with the Right Supplies
Starting a new creative hobby is exciting, but it can also feel overwhelming when you do not know what to buy first. Jewelry making is a perfect example. Walk into a craft store or browse an online bead shop, and you will see hundreds of tools, thousands of beads, different wires, cords, clasps, pliers, charms, chains, organizers, adhesives, and specialty supplies.
If you are a beginner, you may wonder: What do I actually need to start making jewelry? Do I need expensive tools? What supplies are best for bracelet making? Which beads should I buy first? Can I start making DIY jewelry with a small budget?
The good news is that you do not need everything at once. Most beginners can start with a simple collection of basic jewelry making supplies and build from there. A few quality tools, beginner-friendly beads, the right stringing materials, and essential findings are enough to make bracelets, earrings, necklaces, anklets, keychains, and small handmade gifts.
This complete beginner’s guide will walk you through the essential jewelry making supplies every beginner needs. You will learn what each supply is used for, why it matters, and how to choose the best options for your first DIY jewelry projects. Whether you want to focus on bracelet making, bead stringing, wire jewelry, or simple handmade accessories, this guide will help you shop with confidence and avoid wasting money on supplies you do not need yet.
Why the Right Jewelry Making Supplies Matter
The supplies you choose can make a big difference in how easy and enjoyable your first projects feel. Beginner-friendly tools and materials help you finish projects more successfully, while poor-quality supplies can cause frustration.
For example, weak elastic cord may snap after a few wears. Cheap pliers with rough jaws can scratch wire and findings. Beads with tiny holes may not fit your cord. The wrong clasp can make a bracelet difficult to wear. A messy storage system can make it hard to find your supplies when you are ready to create.
Having the right jewelry making supplies helps you:
- Create stronger, longer-lasting jewelry
- Make cleaner and more professional-looking designs
- Save time while working
- Avoid common beginner mistakes
- Practice basic techniques more easily
- Enjoy the process of making DIY jewelry
- Build confidence with each completed project
You do not need to buy the most expensive tools or supplies. But it is worth choosing practical beginner basics that match the kind of jewelry you want to make.
What Jewelry Can Beginners Make First?
Before buying supplies, think about the types of jewelry you want to make. Different projects require different materials. A beginner who wants to make stretch bracelets will need different supplies than someone who wants to make wire-wrapped earrings.
Common beginner DIY jewelry projects include:
- Stretch bracelets
- Beaded bracelets with clasps
- Friendship bracelets
- Charm bracelets
- Simple beaded necklaces
- Dangle earrings
- Hoop earrings with beads
- Adjustable cord bracelets
- Anklets
- Keychains and bag charms
- Phone charms
- Beaded rings
For most beginners, bracelet making is the easiest place to start. Bracelets are small, quick to finish, and easy to customize. They also require fewer beads than necklaces and fewer technical skills than some wire projects. Once you are comfortable making bracelets, you can use many of the same supplies for other DIY jewelry projects.
Essential Jewelry Making Supplies Checklist for Beginners
Here is a quick checklist of the most important jewelry making supplies beginners should consider:
- Beads
- Beading wire
- Elastic cord
- Jewelry cord or thread
- Clasps
- Jump rings
- Crimp beads or crimp tubes
- Head pins and eye pins
- Ear wires
- Charms
- Spacer beads
- Pliers
- Wire cutters
- Scissors
- Bead mat
- Bead board
- Measuring tape or ruler
- Jewelry glue
- Beading needles
- Storage containers
You do not need all of these supplies for your very first project. If you are starting with a simple stretch bracelet, you only need beads, elastic cord, scissors, and glue. If you are making earrings, you will need beads, head pins, ear wires, round nose pliers, chain nose pliers, and wire cutters.
The best beginner jewelry making kit depends on your project goals.
1. Beads: The Foundation of Most DIY Jewelry
Beads are one of the most important supplies in jewelry making. They provide color, texture, shape, style, and personality. For many beginners, beads are also the most exciting part of shopping for supplies.
Beads come in many materials, including:
- Glass
- Gemstone
- Acrylic
- Wood
- Metal
- Ceramic
- Clay
- Crystal
- Pearl
- Shell
- Bone
- Resin
- Seed beads
Each bead type creates a different look and feel. For beginner DIY jewelry, choose beads that are easy to string, comfortable to wear, and compatible with your cord or wire.
Best Beads for Beginners
If you are just getting started, the best beads are usually medium-sized beads with smooth holes. Beads that are too tiny can be frustrating, while very large beads can feel bulky.
Good beginner bead sizes include:
- 6mm beads
- 8mm beads
- 10mm beads
- Size 6/0 seed beads
- Size 8/0 seed beads
- Pony beads
- Flat clay beads
For bracelet making, 6mm and 8mm round beads are especially popular. They are easy to handle, comfortable on the wrist, and work well with many designs.
Popular Beginner Beads
Here are some of the most beginner-friendly beads:
Glass beads: Affordable, colorful, and versatile. Great for bracelets, necklaces, and earrings.
Gemstone beads: Natural and stylish. Popular for stretch bracelets and meaningful DIY jewelry.
Acrylic beads: Lightweight, inexpensive, and available in many fun shapes.
Wooden beads: Natural, casual, and great for boho or earthy jewelry styles.
Clay beads: Trendy, colorful, and excellent for friendship bracelets and stackable bracelets.
Pearl beads: Classic and elegant. Great for bridal, minimalist, and feminine designs.
Letter beads: Perfect for personalized bracelet making.
Spacer beads: Small beads used between larger beads to add detail and balance.
How Many Beads Should Beginners Buy?
It is easy to overbuy beads when you are excited. Start with a small but useful selection. A beginner bead collection might include:
- One strand of 6mm or 8mm gemstone beads
- One pack of glass beads
- One pack of spacer beads
- One pack of letter beads
- One pack of clay beads or seed beads
- One neutral bead color, such as white, black, silver, or clear
- One colorful bead mix
This gives you enough variety to create several DIY jewelry designs without overwhelming your workspace.
2. Elastic Cord for Stretch Bracelet Making
Elastic cord is one of the most important supplies for beginner bracelet making. It is used to make stretch bracelets that slip over the hand without a clasp. These bracelets are simple, fast, and perfect for beginners.
Why Elastic Cord Is Beginner-Friendly
Elastic cord is popular because it does not require complicated finishing techniques. You string the beads, tie a secure knot, add a small amount of glue, and hide the knot inside a bead if possible.
Elastic cord is great for:
- Gemstone stretch bracelets
- Clay bead bracelets
- Kids’ bracelets
- Friendship bracelets
- Stackable bracelets
- Personalized letter bead bracelets
- Quick DIY jewelry gifts
Choosing the Right Elastic Cord Size
Elastic cord comes in different thicknesses. The best size depends on your bead hole size and bracelet style.
Common elastic cord sizes include:
- 0.5mm: Best for small beads with tiny holes
- 0.7mm: Good all-purpose size for many beads
- 0.8mm: Stronger option for medium beads
- 1mm: Best for larger beads with bigger holes
For most beginner bracelet making projects, 0.7mm or 0.8mm elastic cord is a good starting point. Always make sure the cord fits through your beads before starting a design.
Beginner Tip for Elastic Bracelets
Before tying your bracelet, gently stretch the elastic cord. This helps reduce future stretching and keeps the bracelet from becoming loose too quickly.
3. Beading Wire for Stronger Bracelets and Necklaces
Beading wire is a flexible, coated wire used for stringing beads. It is stronger than thread or elastic and is often used for bracelets and necklaces with clasps.
Beading wire is different from craft wire. It is made from tiny strands of stainless steel wire covered with nylon. The more strands it has, the more flexible it usually feels.
When to Use Beading Wire
Use beading wire when you want to make:
- Beaded bracelets with clasps
- Beaded necklaces
- Heavier gemstone jewelry
- Pearl-style necklaces
- More durable DIY jewelry
- Designs that do not stretch
Beading wire is a good choice when you want your jewelry to look more polished and secure. It is especially useful for heavier beads, such as gemstone beads and glass beads.
What You Need with Beading Wire
To finish jewelry made with beading wire, you usually need:
- Crimp beads or crimp tubes
- A clasp
- Jump rings
- Crimping pliers or chain nose pliers
- Wire cutters
This method takes a little more practice than elastic bracelet making, but it creates a strong and professional finish.
4. Jewelry Cord and Thread
Jewelry cord and thread are used for many types of DIY jewelry, especially adjustable bracelets, friendship bracelets, macrame bracelets, bead weaving, and casual designs.
Common jewelry cords and threads include:
- Nylon cord
- Polyester cord
- Cotton cord
- Waxed cord
- Leather cord
- Hemp cord
- Silk thread
- Beading thread
- Stretch floss
- Macrame cord
Best Cord for Beginner Bracelet Making
For adjustable bracelet making, waxed cord or nylon cord is a great beginner choice. These cords are strong, easy to knot, and available in many colors.
For seed bead work, beading thread is better than regular sewing thread. Beading thread is designed to pass through beads multiple times without breaking easily.
For natural or boho DIY jewelry, leather cord, hemp cord, and cotton cord are popular choices.
Matching Cord to Beads
Always check bead hole size before choosing cord. Some beads have very small holes, especially pearls, gemstones, and seed beads. Larger cord may not fit through them.
If you are buying online, look for the bead hole diameter in the product description. If it is not listed, choose thinner cord or contact the seller.
5. Clasps for Finished Jewelry
Clasps are findings that open and close jewelry. They are used on bracelets, necklaces, anklets, and some specialty pieces. While stretch bracelets do not need clasps, many DIY jewelry projects do.
Common Types of Clasps
Beginner-friendly clasps include:
Lobster clasps: Strong, popular, and widely used for bracelets and necklaces.
Spring ring clasps: Small and simple, often used for lightweight necklaces and bracelets.
Toggle clasps: Easy to use and decorative. Great for bracelets.
Magnetic clasps: Easy to open and close, helpful for people who struggle with small clasps.
Hook clasps: Simple and stylish, often used in handmade jewelry.
Box clasps: Decorative and secure, often used for pearl or formal jewelry.
Best Clasps for Beginners
For most beginners, lobster clasps and toggle clasps are the easiest to use. Lobster clasps are secure and common. Toggle clasps are easier to fasten with one hand, which makes them helpful for bracelet making.
Choosing Clasp Color and Finish
Clasps come in different metal finishes, such as:
- Silver tone
- Gold tone
- Rose gold tone
- Antique bronze
- Gunmetal
- Stainless steel
- Sterling silver
- Gold-filled
Choose clasp colors that match your spacer beads, charms, chain, and other metal findings.
6. Jump Rings
Jump rings are small metal rings used to connect jewelry components. They may look simple, but they are one of the most important supplies in DIY jewelry making.
You can use jump rings to attach:
- Clasps
- Charms
- Pendant
- Chain
- Earring components
- Extension chains
- Tags
- Connectors
Open Jump Rings vs. Closed Jump Rings
There are two main types of jump rings:
Open jump rings: Have a small cut that allows you to twist them open and closed.
Closed jump rings: Are soldered shut and cannot be opened.
Beginners usually use open jump rings because they are easy to attach with pliers. Closed jump rings are useful when you need extra strength.
How to Open a Jump Ring Correctly
Do not pull a jump ring apart from side to side. This can weaken the ring and make it lose its shape. Instead, use two pairs of pliers to twist one side forward and the other side backward. After adding your component, twist it closed again.
This simple technique makes your DIY jewelry stronger and cleaner.
7. Crimp Beads and Crimp Tubes
Crimp beads and crimp tubes are small metal pieces used to secure beading wire. They hold the wire in place near the clasp.
If you want to make bracelets or necklaces with beading wire, crimps are essential.
Crimp Beads vs. Crimp Tubes
Crimp beads are round and small. They are often cheaper but can be less consistent.
Crimp tubes are cylindrical and usually provide a cleaner, stronger finish.
Many jewelry makers prefer crimp tubes because they grip wire more evenly.
Tools for Crimping
You can flatten crimps with chain nose pliers, but crimping pliers create a more professional finish. Crimping pliers shape the crimp into a folded bead instead of simply smashing it flat.
Crimp Covers
Crimp covers are small metal covers that hide flattened crimps. They make the finished jewelry look cleaner and more professional. They are optional for beginners, but they are useful if you want polished DIY jewelry.
8. Head Pins and Eye Pins
Head pins and eye pins are metal wires used to create bead drops, charms, dangles, and earrings.
What Is a Head Pin?
A head pin is a straight piece of wire with a flat or decorative end. You slide a bead onto the pin, then make a loop at the top. The bottom of the pin stops the bead from falling off.
Head pins are commonly used for:
- Dangle earrings
- Charm bracelets
- Beaded pendants
- Necklace drops
- Decorative bracelet accents
What Is an Eye Pin?
An eye pin is a straight piece of wire with a loop at one end. You can add beads to the wire and make another loop at the other end. Eye pins are useful for connecting beaded links together.
Eye pins are commonly used for:
- Rosary-style chains
- Beaded connectors
- Linked bracelets
- Handmade chain designs
- Multi-bead dangles
Best Pins for Beginners
Choose head pins and eye pins in a medium gauge, such as 20 gauge or 22 gauge. These are usually strong enough for jewelry but still easy to bend with pliers.
9. Ear Wires and Earring Findings
If you want to make earrings, you will need earring findings. These are the components that go through or attach to the ear.
Common earring findings include:
- Fishhook ear wires
- Lever-back ear wires
- Stud earring posts
- Hoop earrings
- Kidney wires
- Clip-on earring findings
Best Earring Findings for Beginners
Fishhook ear wires are one of the easiest options for beginners. You can attach a beaded dangle using a jump ring or a wrapped loop. Lever-back findings are also beginner-friendly and offer extra security.
Sensitive Ears
If you or your customers have sensitive ears, choose hypoallergenic materials such as:
- Surgical stainless steel
- Titanium
- Niobium
- Sterling silver
- Gold-filled findings
Avoid unknown metal mixes if skin sensitivity is a concern.
10. Charms and Pendants
Charms and pendants add personality to DIY jewelry. They can turn a simple bracelet or necklace into something meaningful and unique.
Charms are popular for:
- Charm bracelets
- Personalized bracelets
- Birthstone jewelry
- Holiday jewelry
- Friendship bracelets
- Bag charms
- Keychains
- Necklaces
Common charm themes include:
- Hearts
- Stars
- Initials
- Flowers
- Animals
- Celestial symbols
- Religious symbols
- Hobbies
- Travel
- Birthstones
- Inspirational words
For beginner bracelet making, charms are a simple way to make your designs feel more special. Add one charm to the center of a beaded bracelet, or attach several charms to a chain bracelet.
When buying charms, check whether they already have a loop. If not, you may need a jump ring.
11. Spacer Beads
Spacer beads are small beads placed between larger beads. They may seem minor, but they can dramatically improve the look of your jewelry.
Why Spacer Beads Are Useful
Spacer beads help:
- Add shine
- Separate colors
- Balance bead patterns
- Make designs look more finished
- Reduce bead rubbing
- Add metal accents
- Create a professional look
Spacer beads are especially useful in bracelet making because they help break up repeated bead patterns. For example, a gemstone bracelet can look much more polished with small gold or silver spacer beads between the stones.
Popular Spacer Bead Styles
Common spacer bead styles include:
- Round metal spacers
- Rhinestone spacers
- Heishi spacers
- Daisy spacers
- Tube spacers
- Disc spacers
- Rondelle spacers
Start with a small pack of silver or gold spacer beads. They will work with many DIY jewelry styles.
12. Jewelry Chain
Jewelry chain is useful for necklaces, bracelets, anklets, and extender chains. Even if you mostly work with beads, chain can add variety to your designs.
Common Chain Types
Beginner-friendly chain types include:
- Cable chain
- Curb chain
- Rolo chain
- Figaro chain
- Ball chain
- Snake chain
- Paperclip chain
Cable chain is one of the easiest and most versatile chains for beginners. It works well for charm bracelets, simple necklaces, and extender chains.
Chain for Bracelet Making
For bracelets, choose chain that is strong enough for daily wear but not too heavy. You can add beads with wire-wrapped loops, attach charms with jump rings, or use chain as part of a mixed-media bracelet design.
Chain Finishes
Like clasps and jump rings, chain comes in many finishes:
- Gold tone
- Silver tone
- Rose gold tone
- Stainless steel
- Antique brass
- Gunmetal
- Sterling silver
- Gold-filled
Try to match your chain finish with your clasps, jump rings, and other findings.
13. Essential Jewelry Making Tools
Tools are just as important as beads and findings. You do not need a huge tool collection as a beginner, but a few basic tools will make jewelry making much easier.
The three most important beginner jewelry making tools are:
- Chain nose pliers
- Round nose pliers
- Wire cutters
These three tools can handle many basic DIY jewelry techniques.
14. Chain Nose Pliers
Chain nose pliers have flat inner jaws and tapered tips. They are used for gripping, bending, opening jump rings, closing loops, and holding small findings.
You will use chain nose pliers for:
- Opening and closing jump rings
- Holding wire
- Flattening crimps
- Adjusting loops
- Gripping small jewelry parts
- Closing bead tips
- Attaching clasps
Chain nose pliers are one of the most useful tools for all types of jewelry making.
Beginner Buying Tip
Look for pliers with smooth jaws. Pliers with ridged jaws can leave marks on wire and findings.
15. Round Nose Pliers
Round nose pliers have two rounded, tapered jaws. They are used to create loops, curves, and coils in wire.
You will need round nose pliers for:
- Making simple loops
- Making wrapped loops
- Creating bead dangles
- Forming eye pin loops
- Making earrings
- Wire wrapping beads
If you want to make earrings, charms, or wire jewelry, round nose pliers are essential.
Beginner Tip
The position of the wire on the plier jaws affects loop size. If you wrap wire near the tip, the loop will be small. If you wrap wire farther down the jaws, the loop will be larger.
16. Wire Cutters
Wire cutters are used to cut beading wire, craft wire, head pins, eye pins, and chain. Do not use regular scissors for wire because wire can damage the blades.
Types of Wire Cutters
Flush cutters are especially useful because they create a cleaner cut. This helps reduce sharp wire ends in your DIY jewelry.
Use wire cutters for:
- Cutting head pins
- Cutting eye pins
- Cutting beading wire
- Cutting craft wire
- Cutting thin chain
- Trimming wrapped loops
Safety Tip
Small wire pieces can fly when cut. Hold the wire securely and point the cut end away from your face.
17. Crimping Pliers
Crimping pliers are used to fold and secure crimp beads or crimp tubes. They are not required for your very first project, but they are helpful if you plan to make necklaces or bracelets with beading wire.
Crimping pliers usually have two notches:
- One notch folds the crimp
- One notch rounds the crimp
This creates a cleaner finish than flattening a crimp with regular pliers.
If you are serious about making polished DIY jewelry, crimping pliers are worth adding to your tool kit.
18. Scissors
Scissors are simple but necessary. Use them to cut elastic cord, thread, ribbon, cotton cord, nylon cord, and other soft materials.
It is best to keep one sharp pair of scissors just for jewelry making. Dull scissors can fray cord and make your projects look messy.
Do not use your best scissors to cut wire. Use wire cutters for metal materials.
19. Beading Needles
Beading needles are thin needles used to pass thread through small beads. They are especially useful for seed beads, bead weaving, bead embroidery, and designs that require multiple passes through the same bead.
When Beginners Need Beading Needles
You may need beading needles if you want to make:
- Seed bead bracelets
- Loom bracelets
- Bead woven rings
- Beaded fringe earrings
- Peyote stitch designs
- Brick stitch designs
- Bead embroidery
If your first projects are simple stretch bracelets with larger beads, you may not need beading needles right away. But if you are interested in detailed beadwork, they are essential.
20. Bead Mat
A bead mat is a soft surface that keeps beads from rolling away while you work. It may not seem important at first, but it can make jewelry making much easier.
Why Use a Bead Mat?
A bead mat helps:
- Keep beads in place
- Protect beads from scratches
- Organize small findings
- Reduce mess
- Make stringing easier
- Prevent beads from bouncing off the table
Bead mats are inexpensive and very useful. If you do not have one yet, you can temporarily use a soft towel or piece of felt, but a proper bead mat is more convenient.
21. Bead Board
A bead board is a tray with measurement grooves used to plan jewelry designs before stringing. It is especially useful for necklaces and patterned bracelets.
Why Beginners Like Bead Boards
A bead board allows you to:
- Arrange beads before stringing
- Measure bracelet and necklace length
- Test color patterns
- Plan symmetrical designs
- Prevent mistakes
- Keep beads organized while designing
For bracelet making, a bead board can help you estimate how many beads you need and where to place accent beads, charms, and spacers.
A bead board is optional, but it is very helpful if you like planning designs before committing to them.
22. Measuring Tape or Ruler
Accurate measurements are important in jewelry making. A bracelet that is too tight will be uncomfortable, while one that is too loose may fall off.
Use a measuring tape or ruler to measure:
- Wrist size
- Bracelet length
- Necklace length
- Anklet length
- Cord length
- Chain length
- Wire length
- Bead strand length
Bracelet Making Size Guide
Common bracelet sizes include:
- Small adult bracelet: 6.5 inches
- Average adult bracelet: 7 inches
- Large adult bracelet: 7.5 to 8 inches
- Kids’ bracelet: 5 to 6 inches
- Toddler bracelet: 4.5 to 5 inches
For stretch bracelets, add a little extra length for comfort depending on bead size. Larger beads take up more space around the wrist, so the bracelet may need to be slightly longer.
23. Jewelry Glue
Jewelry glue is useful for securing knots, attaching certain findings, and adding extra durability to some DIY jewelry projects.
Best Uses for Jewelry Glue
Use jewelry glue for:
- Securing elastic bracelet knots
- Attaching cord ends
- Gluing flat-back crystals
- Securing knots in thread
- Reinforcing certain findings
For stretch bracelet making, many beginners add a small dot of glue to the knot before hiding it inside a bead. This can help prevent the knot from loosening.
Glue Safety Tip
Use only a small amount of glue. Too much glue can look messy, stiffen cord, or leave visible residue.
24. Bead Stoppers
Bead stoppers are small spring-like tools that clamp onto wire or cord to prevent beads from sliding off while you work.
They are useful when making:
- Beaded bracelets
- Necklaces
- Multi-strand jewelry
- Long designs
- Projects with small beads
If you do not have bead stoppers, you can use a small piece of tape or a temporary knot, but bead stoppers are cleaner and easier to move.
25. Jewelry Storage Containers
Good storage makes jewelry making more enjoyable. Beads and findings are small, and they can quickly become messy if you do not have a system.
Best Storage Options for Beginners
Useful storage containers include:
- Small plastic bead boxes
- Divided organizer trays
- Stackable containers
- Zip bags
- Glass jars
- Drawer organizers
- Label boxes
- Tool rolls
- Tackle boxes
What to Store Separately
Keep these supplies separated:
- Beads by color
- Beads by size
- Beads by material
- Clasps
- Jump rings
- Crimps
- Ear wires
- Head pins and eye pins
- Charms
- Cords and wires
A simple labeled storage system saves time and helps you see what supplies you already own before buying more.
26. Optional Supplies Beginners May Want Later
Once you have the basics, you may want to add specialty tools and supplies. These are not necessary for every beginner, but they can expand your DIY jewelry options.
Optional jewelry making supplies include:
- Memory wire
- Memory wire cutters
- Wire looping pliers
- Nylon jaw pliers
- Bent nose pliers
- Split ring pliers
- Jewelry hammer
- Bench block
- Ring mandrel
- Mandrel Bracelet
- Metal stamping tools
- Resin supplies
- UV resin lamp
- Bead loom
- Macrame board
- Polishing cloth
- Anti-tarnish strips
Do not feel pressured to buy all of these right away. Start with the supplies you need for your first few projects, then add tools as your skills grow.
Best Beginner Supplies for Bracelet Making
Because bracelet making is one of the most popular DIY jewelry projects, it is helpful to have a specific beginner bracelet supply list.
For simple stretch bracelets, you need:
- Beads
- Elastic cord
- Scissors
- Jewelry glue
- Bead mat
- Measuring tape
For beaded bracelets with clasps, you need:
- Beads
- Beading wire
- Clasps
- Jump rings
- Crimp beads or crimp tubes
- Wire cutters
- Chain nose pliers
- Crimping pliers
- Measuring tape
For charm bracelets, you need:
- Chain
- Charms
- Jump rings
- Clasp
- Chain nose pliers
- Wire cutters, if cutting chain
- Optional beads or bead dangles
For adjustable cord bracelets, you need:
- Cord
- Beads with large enough holes
- Scissors
- Jewelry glue
- Optional charms
- Optional knotting board
Starting with stretch bracelets is usually easiest. After that, learning clasps, crimps, and jump rings will open up many more bracelet making possibilities.
Best Beginner Supplies for Earrings
Earrings are another great beginner DIY jewelry project. They use fewer beads than bracelets or necklaces, so they are affordable and quick to make.
For simple beaded earrings, you need:
- Beads
- Head pins
- Ear wires
- Round nose pliers
- Chain nose pliers
- Wire cutters
- Optional spacer beads
- Optional charms
A simple dangle earring can be made by sliding beads onto a head pin, making a loop, and attaching it to an ear wire. Once you learn this skill, you can create many earring designs.
Best Beginner Supplies for Necklaces
Necklaces require more planning than bracelets because they are longer and usually need a clasp. But simple beaded necklaces are still beginner-friendly.
For a basic beaded necklace, you need:
- Beads
- Beading wire
- Clasp
- Jump rings
- Crimp beads or crimp tubes
- Wire cutters
- Chain nose pliers
- Crimping pliers
- Bead board or ruler
- Optional pendant
For a simple pendant necklace, you need:
- Chain
- During
- Jump rings
- Clasp
- Chain nose pliers
- Wire cutters
If you are just starting out, a pendant necklace may be easier than a fully beaded necklace.
How to Choose Quality Jewelry Making Supplies
Not all jewelry making supplies are equal. You do not need luxury materials, but you should avoid supplies that break easily, tarnish quickly, or make your projects harder than necessary.
Check Bead Quality
When buying beads, look for:
- Smooth holes
- Consistent sizing
- Durable finish
- No sharp edges
- No major chips or cracks
- Accurate product photos
- Clear size information
Poorly drilled beads can cut elastic cord or thread. Sharp bead holes are one of the most common reasons stretch bracelets break.
Check Metal Findings
When buying findings, look for:
- Strong clasps
- Jump rings that close tightly
- Smooth surfaces
- Consistent color finish
- Nickel-free options if needed
- Stainless steel, sterling silver, or gold-filled options for better durability
Very cheap findings may tarnish quickly or bend too easily.
Check Cord and Wire Strength
For cords and wires, check:
- Diameter
- Weight rating, if listed
- Flexibility
- Compatibility with bead holes
- Reviews from other jewelry makers
- Brand reputation
Strong stringing material is especially important for bracelet making because bracelets receive more movement and friction than many other jewelry pieces.
Budget-Friendly Jewelry Making: What to Buy First
If you are starting DIY jewelry on a budget, buy supplies based on the projects you want to make first. Avoid buying huge kits filled with items you may never use.
Beginner Budget Kit for Stretch Bracelets
A simple budget kit could include:
- One pack of elastic cord
- Two or three bead strands
- One pack of spacer beads
- Small scissors
- Jewelry glue
- Measuring tape
This is enough to make several stretch bracelets.
Beginner Budget Kit for Earrings
A simple earring kit could include:
- One pack of head pins
- One pack of ear wires
- A small bead mix
- Round nose pliers
- Chain nose pliers
- Wire cutters
This is enough to make many pairs of earrings.
Beginner Budget Kit for Beaded Jewelry with Clasps
A clasp-based kit could include:
- Beading wire
- Crimp tubes
- Lobster clasps
- Jump rings
- Beads
- Wire cutters
- Chain nose pliers
- Crimping pliers
This is enough for bracelets and necklaces with a more traditional finish.
Common Beginner Mistakes When Buying Jewelry Supplies
Beginners often buy supplies that look pretty but do not work well together. Avoiding a few common mistakes can save money and frustration.
Mistake 1: Buying Beads Without Checking Hole Size
A bead may be beautiful, but it will not work if your cord cannot pass through it. Always check bead hole size, especially for pearls, gemstones, crystals, and seed beads.
Mistake 2: Buying Too Many Random Beads
A huge random bead mix can be fun, but it may not give you enough matching beads to complete a polished design. Try buying beads in coordinated colors or strands.
Mistake 3: Using Weak Elastic Cord
Cheap elastic can snap, stretch out, or become brittle. Choose good-quality elastic cord for stretch bracelet making.
Mistake 4: Using the Wrong Tool for Wire
Scissors are not wire cutters. Regular household pliers are not ideal for jewelry work. Jewelry tools give cleaner results and protect your supplies.
Mistake 5: Forgetting Findings
Many beginners buy beads but forget clasps, jump rings, crimps, or ear wires. Findings are essential for finishing DIY jewelry.
Mistake 6: Ignoring Metal Allergies
If making jewelry for yourself or others, consider skin sensitivity. Nickel-free, stainless steel, titanium, sterling silver, and gold-filled findings are safer choices for many people.
Mistake 7: Not Measuring Before Stringing
Measuring matters, especially in bracelet making. Always measure the wrist and plan the finished bracelet length before tying or crimping.
Beginner-Friendly DIY Jewelry Project Ideas
Once you have your essential supplies, you can start creating simple projects. Here are some easy DIY jewelry ideas for beginners.
1. Simple Stretch Bracelet
Use 8mm beads and elastic cord. String the beads, check the fit, tie a secure knot, add a small dot of glue, and hide the knot inside a bead.
2. Clay Bead Friendship Bracelet
Use flat clay beads, letter beads, and elastic cord. Spell a name, word, or short phrase in the center.
3. Gemstone Bracelet with Spacer Beads
Use gemstone beads and small metal spacers. This creates a polished bracelet that looks great alone or stacked.
4. Charm Bracelet
Use chain, jump rings, a clasp, and charms. Attach charms evenly along the chain.
5. Beaded Hoop Earrings
Add small beads to hoop earring findings for a quick and stylish project.
6. Dangle Earrings
Use beads, head pins, and ear wires. This is a great way to practice making loops.
7. Pendant Necklace
Use chain, a pendant, jump rings, and a clasp. This is one of the easiest necklace projects for beginners.
8. Adjustable Cord Bracelet
Use waxed cord and beads with larger holes. Learn basic sliding knots for an adjustable fit.
How to Set Up a Beginner Jewelry Making Workspace
You do not need a large studio to make jewelry. A small table or desk is enough. The key is to keep your supplies organized and your work surface clean.
Basic Workspace Setup
A beginner jewelry making workspace should include:
- Good lighting
- A flat table
- Comfortable chair
- Bead mat
- Small containers for findings
- Tool storage
- Trash container for wire scraps
- Measuring tape
- Organized bead storage
Good lighting is especially important when working with small beads, jump rings, and crimps.
Keep Supplies Within Reach
Store your most-used supplies close to your workspace. These might include pliers, scissors, wire cutters, elastic cord, jump rings, clasps, and favorite beads.
Jewelry Making Safety Tips for Beginners
Jewelry making is generally safe, but a few precautions are important.
Protect Your Eyes
Wire pieces can fly when cut. Hold wire firmly and cut away from your face.
Keep Small Parts Away from Children and Pets
Beads, charms, and findings can be choking hazards. Store supplies securely.
Use Glue Carefully
Work in a ventilated area when using strong adhesives. Avoid touching glue with your skin and follow product instructions.
Handle Sharp Wire Ends
Trim wire carefully and tuck ends in properly. Sharp wire can scratch skin or snag clothing.
Choose Skin-Safe Materials
For earrings and everyday jewelry, use hypoallergenic findings when possible.
How to Care for Your Jewelry Making Supplies
Taking care of your supplies helps them last longer.
Store Beads Properly
Keep beads dry and away from direct sunlight. Some dyed beads may fade over time if exposed to strong light.
Prevent Tarnish
Store metal findings in sealed bags or containers. Anti-tarnish strips can help protect sterling silver and other metals.
Protect Tools
Keep pliers and cutters dry. Do not use jewelry cutters on thick hardware wire unless they are rated for it.
Keep Cord Clean
Store cord and thread away from dust, moisture, and heat. Elastic cord can weaken over time, so avoid storing it in hot sunlight.
SEO Tips for Selling DIY Jewelry Online
If your beginner hobby turns into a handmade jewelry business, your supply choices will affect your product quality and your product descriptions.
When listing jewelry online, include clear details such as:
- Bead material
- Bead size
- Bracelet length
- Metal finish
- Clasp type
- Cord or wire type
- Customization options
- Care instructions
- Whether earrings are hypoallergenic
- Whether gemstones are natural, dyed, or synthetic
For example, instead of saying “pretty bracelet,” you could write: “Handmade 8mm rose quartz bead bracelet on durable elastic cord with gold-tone spacer beads.”
This type of description includes helpful keywords like beads, bracelet, handmade, and DIY jewelry while giving shoppers useful information.
Jewelry Making Supplies FAQ
What supplies do I need to start making jewelry?
To start making jewelry, you need beads, stringing material, basic findings, and a few tools. For simple bracelet making, start with beads, elastic cord, scissors, jewelry glue, and a measuring tape. For earrings, start with beads, head pins, ear wires, round nose pliers, chain nose pliers, and wire cutters.
What are the most important tools for beginner jewelry making?
The three most important jewelry making tools are chain nose pliers, round nose pliers, and wire cutters. These tools allow you to open jump rings, make loops, cut wire, attach findings, and create many beginner DIY jewelry projects.
What beads are best for beginners?
The best beads for beginners are easy to handle, durable, and compatible with your cord or wire. Good options include glass beads, acrylic beads, gemstone beads, wooden beads, clay beads, pearl beads, and larger seed beads. For bracelet making, 6mm and 8mm beads are especially beginner-friendly.
What do I need for bracelet making?
For stretch bracelet making, you need beads, elastic cord, scissors, jewelry glue, and a measuring tape. For bracelets with clasps, you need beads, beading wire, clasps, jump rings, crimp beads or crimp tubes, wire cutters, and pliers.
Is DIY jewelry making expensive?
DIY jewelry making can be affordable. Beginners can start with a small set of supplies and add more over time. Stretch bracelets are one of the cheapest projects to begin with because they require only beads, elastic cord, scissors, and glue.
Can I make jewelry without special tools?
You can make very simple stretch bracelets with minimal tools, but basic jewelry tools make the process easier and produce better results. Chain nose pliers, round nose pliers, and wire cutters are worth buying if you plan to make DIY jewelry regularly.
What is the easiest jewelry to make for beginners?
Stretch bracelets are usually the easiest jewelry for beginners. They require few supplies, no clasp, and only basic knotting. Simple dangle earrings and pendant necklaces are also beginner-friendly.
What string is best for bead bracelets?
Elastic cord is best for stretch bead bracelets. Beading wire is best for bracelets with clasps. Waxed cord, nylon cord, leather cord, and hemp cord are good for adjustable or knotted bracelet designs.
Do I need a bead board?
A bead board is optional, but it is helpful for planning bracelet and necklace designs. It allows you to arrange beads, test patterns, and measure length before stringing.
How do I stop beads from falling off while I work?
Use a bead stopper, temporary knot, or small piece of tape at the end of your cord or wire. A bead mat also helps keep loose beads from rolling away.
Final Thoughts: Build Your Jewelry Making Supplies One Project at a Time
You do not need a huge collection of tools and materials to begin making beautiful DIY jewelry. The smartest approach is to choose one type of project, buy the supplies needed for that project, and practice the basic techniques before expanding your collection.
If you want the easiest starting point, begin with stretch bracelet making. Buy a few strands of beads, a spool of elastic cord, scissors, jewelry glue, and a measuring tape. With those simple supplies, you can make stylish bracelets for yourself, gifts, or even your first handmade products.
As your skills grow, add beading wire, clasps, jump rings, crimp beads, jewelry chain, charms, head pins, eye pins, and basic tools like chain nose pliers, round nose pliers, and wire cutters. These supplies will allow you to create bracelets, earrings, necklaces, anklets, and many other DIY jewelry designs.
The most important thing is to start simple and learn by making. Each project will teach you something useful about beads, sizing, color, pattern, durability, and finishing techniques. Over time, your supply collection will naturally grow around the jewelry you enjoy creating most.
With the right beginner jewelry making supplies, a little patience, and a creative eye, you can turn simple beads and findings into handmade pieces that feel personal, polished, and unique.
