Blog
How To Make Stretch Bracelets That Dont Break
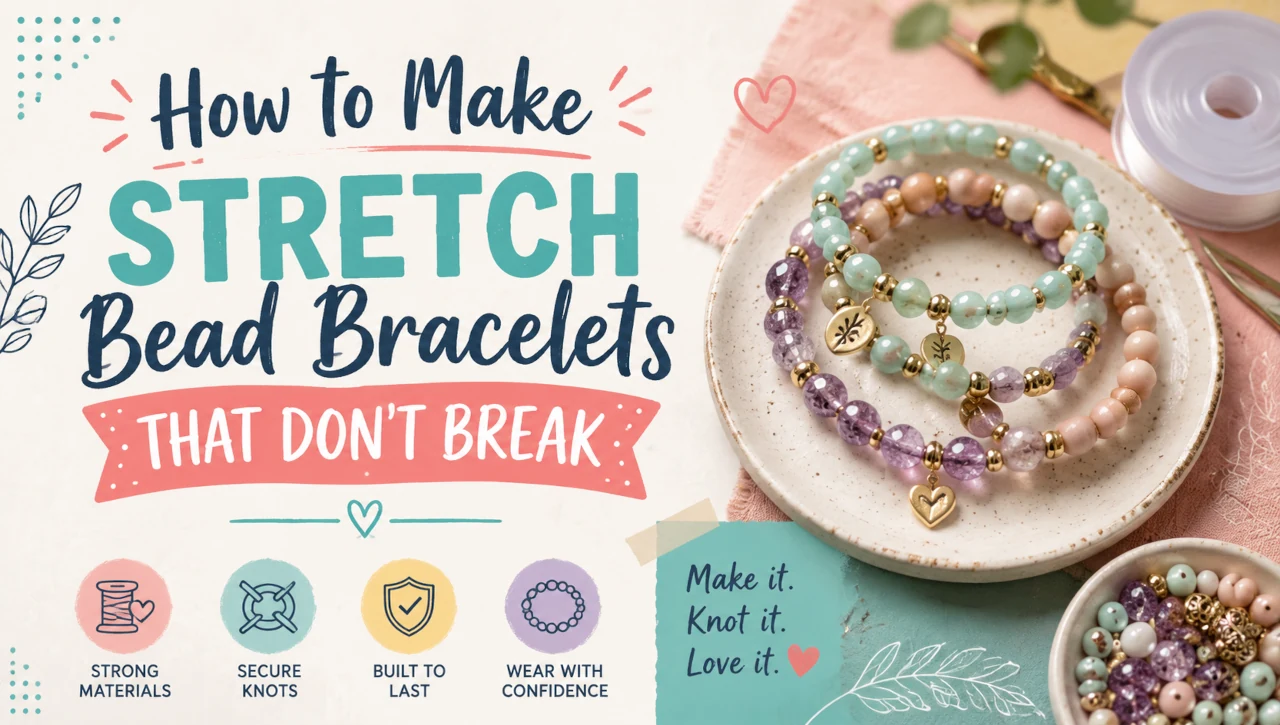
Why Stretch Bead Bracelets Break
Stretch bead bracelets are one of the most popular projects in bracelet making because they are simple, comfortable, affordable, and easy to customize. With the right beads, elastic cord, and finishing method, you can create beautiful bracelets for yourself, handmade gifts, craft fairs, or an Etsy store.
But if you have ever made a stretch bracelet that snapped, stretched out, or came untied, you know how frustrating it can be. A bracelet may look perfect when it is finished, but if the elastic cord is too thin, the knot is weak, the beads have sharp holes, or the bracelet is pulled too hard, it can break quickly.
The good news is that most broken stretch bracelets are preventable. Strong stretch bracelets depend on several small details working together: the right elastic size, smooth bead holes, correct wrist sizing, secure knots, flexible glue, and proper care instructions.
This guide explains how to make stretch bead bracelets that don’t break. It is written for beginners, hobbyists, and DIY jewelry sellers who want their bracelets to look professional and last longer. If you sell handmade jewelry online, these tips can also help reduce customer complaints, returns, and repair requests.
Whether you are making gemstone bracelets, clay bead bracelets, letter bead bracelets, crystal bead bracelets, or stackable bracelets for your Etsy store, this step-by-step guide will help you improve the durability and quality of your handmade jewelry.
What Are Stretch Bead Bracelets?
Stretch bead bracelets are bracelets made by stringing beads onto elastic cord instead of wire, chain, or thread with a clasp. The bracelet stretches over the hand and sits comfortably around the wrist.
They are popular because they are:
- Easy for beginners to make
- Comfortable to wear
- Simple to put on and take off
- Great for stacking
- Customizable by color, size, bead type, and charm
- Affordable to produce
- Lightweight to ship
- Popular for online making tutorials and DIY jewelry shops
Stretch bracelets can be made with many types of beads, including gemstone beads, crystal beads, glass beads, acrylic beads, clay beads, pearl beads, wooden beads, lava beads, seed beads, and letter beads.
Because they are easy to make, many beginners assume stretch bracelets are foolproof. In reality, stretch bracelet making requires careful construction. Elastic cord is flexible, but it is not indestructible. If you want bracelets that last, every material choice matters.
Why Durability Matters in Bracelet Making
Durability is important whether you are making one bracelet for yourself or building a DIY jewelry business. A broken bracelet can mean lost beads, wasted time, and frustration. For sellers, it can also mean unhappy customers, negative reviews, refunds, and damaged trust.
If you sell through an Etsy store, Shopify store, craft market, or social media, durability is part of your product quality. Customers may not know the difference between 0.5mm and 0.8mm elastic cord, but they will notice if a bracelet breaks after a few wears.
Strong bracelet making helps you:
- Create better handmade products
- Build customer trust
- Reduce returns and complaints
- Improve Etsy store reviews
- Increase repeat purchases
- Support higher pricing
- Make your DIY jewelry look more professional
A bracelet that does not break easily feels better, wears better, photographs better, and represents your brand better.
The Main Reasons Stretch Bead Bracelets Break
Before learning how to make stronger bracelets, it helps to understand why they fail. Most broken stretch bead bracelets are caused by one or more of these issues.
| Problem | What Happens | How to Prevent It |
|---|---|---|
| Elastic cord is too thin | Cord snaps under bead weight or stretching | Use the thickest cord that fits through your beads |
| Bead holes are sharp | Rough bead edges cut into the elastic | Check beads before stringing and avoid sharp holes |
| Bracelet is too tight | Elastic is always under stress | Add proper ease to the wrist measurement |
| Knot is weak | Bracelet comes untied | Use a surgeon’s knot or strong multi-knot method |
| Wrong glue is used | Glue hardens, cracks, or damages elastic | Use flexible jewelry glue made for elastic |
| Cord is not pre-stretched | Bracelet becomes loose after wearing | Gently pre-stretch the cord before stringing |
| Beads are too heavy | Heavy beads pull on thin cord | Match cord size to bead weight |
| Bracelet is pulled on | Elastic weakens from overstretching | Roll the bracelet on and off |
| Chemicals weaken cord | Perfume, lotion, water, and sweat damage elastic | Include care instructions |
| Poor finishing | Knot is exposed and rubs against skin | Hide the knot inside a bead when possible |
The strongest bracelets are not made with one magic material. They are made by controlling all the weak points.
Best Beads for Stretch Bracelets That Last
The beads you choose affect how long your bracelet lasts. Some beads are lightweight and easy on elastic, while others are heavy or have rough holes that can weaken the cord.
Good Beads for Beginner Stretch Bracelet Making
| Bead Type | Durability Level | Best Cord Match | Notes |
|---|---|---|---|
| Acrylic beads | High | 0.7mm to 1.0mm elastic | Lightweight and beginner-friendly |
| Clay beads | Medium to high | 0.5mm to 0.8mm elastic | Trendy, lightweight, and colorful |
| Gemstone beads | Medium to high | 0.7mm to 1.0mm elastic | Beautiful but heavier than acrylic |
| Glass beads | Medium | 0.7mm to 1.0mm elastic | Check for sharp holes |
| Crystal beads | Medium | 0.7mm to 0.8mm elastic | Faceted edges can be abrasive |
| Pearl beads | Medium | 0.5mm to 0.8mm elastic | Often have smaller holes |
| Wooden beads | High | 0.8mm to 1.0mm elastic | Lightweight, natural, and casual |
| Lava beads | Medium | 0.8mm to 1.0mm elastic | Holes may be rough, inspect carefully |
| Seed beads | Medium | Elastic thread or 0.3mm to 0.5mm cord | Best for delicate bracelets |
| Letter beads | High | 0.7mm to 1.0mm elastic | Great for personalized DIY jewelry |
What to Check Before Using Beads
Before stringing your bracelet, inspect your beads. This is especially important if you are selling jewelry in an Etsy store.
Check for:
- Sharp bead holes
- Cracks
- Chips
- Uneven drilling
- Paint peeling
- Rough edges
- Beads that are too heavy for the cord
- Beads that do not fit the elastic
A single rough bead can cut elastic cord over time. If you feel friction when pulling the cord through a bead, do not use that bead in a stretch bracelet.
Best Elastic Cord for Stretch Bead Bracelets
Choosing the right elastic cord is one of the most important parts of making stretch bead bracelets that don’t break. The goal is to use the thickest, strongest cord that fits comfortably through the bead holes and can still be tied securely.
Elastic Cord Size Guide
| Elastic Cord Size | Best For | Avoid Using With |
|---|---|---|
| 0.3mm | Tiny seed beads, delicate designs | Heavy gemstone beads |
| 0.5mm | Seed beads, small pearls, small clay beads | Large gemstone beads |
| 0.7mm | 6mm beads, clay beads, small gemstones | Very heavy beads |
| 0.8mm | 8mm gemstone beads, glass beads, crystal beads | Tiny bead holes |
| 1.0mm | Large-hole beads, 10mm beads, heavy bracelets | Small pearls or seed beads |
| 1.2mm+ | Large wooden beads, chunky acrylic beads | Most gemstone beads with small holes |
For most beginner bracelet making projects, 0.7mm or 0.8mm elastic cord is the best starting point. These sizes work well with many common beads and provide better strength than very thin cord.
Clear Elastic vs. Fabric Elastic
| Cord Type | Best For | Pros | Cons |
|---|---|---|---|
| Clear elastic cord | Gemstones, glass, crystal, acrylic, pearl beads | Clean look, blends into designs, widely available | Can be slippery when knotting |
| Fabric-covered elastic | Pony beads, large-hole beads, casual bracelets | Knots grip well, softer texture | More visible and less polished |
| Elastic beading thread | Seed beads, woven bracelets, delicate DIY jewelry | Thin and flexible | Not ideal for heavy beads |
| Silicone elastic | Stretch bracelets with smooth beads | Soft, clear, flexible | May not hold knots as well |
If you are making bracelets for an Etsy store, test several brands before committing to one. Quality varies. A cord that looks fine on the spool may stretch out, fray, or snap after repeated use.
Recommended Cord and Bead Pairings
Use this quick chart as a practical bracelet making reference.
| Bracelet Style | Recommended Beads | Recommended Cord | Durability Tip |
|---|---|---|---|
| Gemstone stretch bracelet | 6mm gemstone beads | 0.7mm elastic | Use smooth-drilled beads |
| Classic crystal bracelet | 8mm crystal or gemstone beads | 0.8mm elastic | Avoid sharp faceted holes |
| Chunky statement bracelet | 10mm acrylic or wood beads | 1.0mm elastic | Make sure bead holes are large enough |
| Clay bead bracelet | 6mm polymer clay beads | 0.5mm to 0.7mm elastic | Avoid overstretching thin designs |
| Name bracelet | Letter beads plus accent beads | 0.7mm to 0.8mm elastic | Test letter bead holes first |
| Seed bead bracelet | Seed beads | Elastic thread or 0.3mm to 0.5mm cord | Use delicate tension |
| Pearl bracelet | Glass pearls or freshwater pearls | 0.5mm to 0.8mm elastic | Check hole size carefully |
| Men’s beaded bracelet | 8mm to 10mm stone beads | 0.8mm to 1.0mm elastic | Use strong cord and proper ease |
Simple Durability Graph for Stretch Bracelets
Below is a simple visual guide showing how much each factor affects stretch bracelet durability.
Elastic cord quality       ██████████ 10/10
Secure knotting            ██████████ 10/10
Smooth bead holes          █████████  9/10
Correct bracelet sizing    ████████   8/10
Flexible jewelry glue      ███████    7/10
Proper customer care       ███████    7/10
Bead weight                ██████     6/10
Packaging protection       ████       4/10
The biggest durability factors are elastic quality, knot security, and bead hole smoothness. If you improve only those three areas, your stretch bracelets will already be much stronger.
Supplies You Need to Make Stretch Bead Bracelets That Don’t Break
You do not need expensive equipment for stretch bracelet making, but you do need the right supplies.
Basic Supplies
| Supply | Purpose |
|---|---|
| Beads | Main design material |
| Elastic cord | Stretch foundation |
| Scissors or flush cutters | Cutting cord cleanly |
| Bead mat | Prevents beads from rolling away |
| Measuring tape | Helps size the bracelet |
| Bead stopper or tape | Holds beads on the cord while stringing |
| Jewelry glue | Secures the knot |
| Optional spacer beads | Adds style and helps hide knots |
| Optional charms | Adds personalization |
| Optional bead reamer | Smooths rough bead holes |
For professional DIY jewelry, avoid using random household glue, weak thread, or poor-quality elastic. These shortcuts often lead to broken bracelets.
How to Measure for a Stretch Bead Bracelet
Sizing is one of the most overlooked reasons stretch bracelets break. If a bracelet is too tight, the elastic is constantly under stress. Every time the customer wears it, the cord is stretched harder than necessary.
Basic Sizing Formula
Measure the wrist and add ease.
| Fit Style | Formula |
|---|---|
| Snug fit | Wrist size + 0.25 inch |
| Comfortable fit | Wrist size + 0.5 inch |
| Loose fit | Wrist size + 0.75 inch |
| Large bead fit | Wrist size + 0.75 to 1 inch |
Large beads take up more internal space, so a bracelet made with 10mm beads may need more length than a bracelet made with 4mm beads.
Common Bracelet Sizes
| Wrist Size | Suggested Finished Bracelet Size |
|---|---|
| 5.5 inches | 6 inches |
| 6 inches | 6.5 inches |
| 6.5 inches | 7 inches |
| 7 inches | 7.5 inches |
| 7.5 inches | 8 inches |
| 8 inches | 8.5 inches |
If you sell in an Etsy store, include a bracelet size chart in your listing photos and description. This helps customers order the correct size and reduces returns.
Step-by-Step: How to Make Stretch Bead Bracelets That Don’t Break
Follow these steps for a stronger, cleaner, more professional bracelet.
Step 1: Choose the Right Beads
Select beads that match your design and cord size. For beginners, 6mm or 8mm round beads are easiest to work with. Gemstone beads, glass beads, clay beads, pearl beads, and acrylic beads are all popular for DIY jewelry.
Before using the beads, inspect the holes. If the hole feels sharp or rough, set that bead aside or smooth it carefully with a bead reamer.
Step 2: Choose the Right Elastic Cord
Use the thickest elastic cord that fits through your beads. The cord should pass through the bead holes without forcing. If you have to pull too hard, the cord may scrape against the bead and weaken.
For most 8mm beads, 0.8mm elastic cord is a good choice. For 6mm beads, 0.7mm often works well. For tiny beads, use thinner elastic thread.
Step 3: Pre-Stretch the Elastic Cord
Pre-stretching helps prevent the bracelet from becoming loose after a few wears.
To pre-stretch elastic cord:
- Cut a piece of cord about 10 to 12 inches long.
- Hold both ends.
- Gently pull the cord several times.
- Do not yank aggressively.
- Let the cord relax before stringing.
This small step can improve the finished bracelet’s shape and fit.
Step 4: Plan the Bead Pattern
Lay the beads on a bead mat before stringing. This helps you check the design, spacing, colors, and size.
Popular stretch bracelet patterns include:
- All one bead type
- Alternating two colors
- Gemstone beads with metal spacers
- Clay beads with letter beads
- Birthstone bracelet with charm
- Neutral bracelet stack
- Rainbow bead pattern
- Minimalist pearl bracelet
- Black onyx bracelet with silver accents
- Rose quartz bracelet with gold spacers
Planning the pattern first is especially useful if you are creating products for an Etsy store. Consistent patterns make it easier to reproduce designs for multiple customers.
Step 5: String the Beads
Place a bead stopper or small piece of tape at one end of the cord. String the beads in the order you planned.
Do not pull the cord tightly while stringing. Keep light tension so the beads sit together naturally without stretching the elastic.
Step 6: Test the Bracelet Size
Before tying the knot, wrap the bracelet around your wrist or a bracelet sizing cone. Check that the beads meet comfortably without stretching the cord.
The bracelet should sit around the wrist without gaps, but it should not be tight. If the elastic is already stretched while the bracelet is resting, the bracelet is too small.
Step 7: Tie a Strong Knot
The knot is one of the most important parts of stretch bracelet making. A weak knot can slip, loosen, or untie.
A surgeon’s knot is one of the best knots for elastic bracelets.
How to Tie a Surgeon’s Knot
- Cross the two ends of elastic cord.
- Wrap one end around the other twice.
- Pull gently to tighten.
- Tie another overhand knot.
- Pull all four cord directions carefully to secure.
- Add one more half knot if needed.
The knot should be tight, but do not pull so hard that the cord snaps.
Step 8: Add Flexible Jewelry Glue
After tying the knot, add a tiny drop of flexible jewelry glue. Do not use too much glue. Excess glue can make the bracelet look messy and may stiffen the cord.
Look for glue that works with elastic, jewelry, or bead stringing. Avoid brittle glue that dries hard and cracks when stretched.
Let the glue dry fully according to the instructions before wearing, photographing, packaging, or selling the bracelet.
Step 9: Hide the Knot
If possible, slide the knot into a nearby bead with a large enough hole. This protects the knot from rubbing against skin, clothing, or packaging.
If the knot will not fit inside a bead, use a large-hole accent bead, metal spacer, crimp cover, or charm area to hide the finish.
Step 10: Trim the Ends
Once the glue is dry, trim the excess cord carefully. Leave a tiny tail if the knot is hidden inside a bead. Do not cut too close before the glue cures.
Step 11: Test the Bracelet
Before gifting or selling the bracelet, test it gently.
Check for:
- Loose knots
- Sharp beads
- Overstretched elastic
- Gaps between beads
- Uncomfortable fit
- Glue residue
- Weak points
- Beads that rub against the knot
Do not aggressively stretch the bracelet as a test. Real durability comes from proper construction, not from pulling the bracelet as hard as possible.
Best Knots for Stretch Bead Bracelets
Different makers prefer different knots, but some are more reliable than others.
| Knot Type | Best For | Strength | Beginner Friendly? |
|---|---|---|---|
| Surgeon’s knot | Most stretch bracelets | High | Yes |
| Square knot | Lightweight bracelets | Medium | Yes |
| Double overhand knot | Simple bracelets | Medium | Yes |
| Multiple half knots | Added security | Medium to high | Yes |
| Crimping elastic | Not usually recommended | Low to medium | No |
For most bracelet making projects, a surgeon’s knot with a tiny amount of flexible jewelry glue is a strong and beginner-friendly option.
Glue Guide for Elastic Bracelet Knots
Glue can help secure the knot, but the wrong glue can cause problems. Some glues dry too hard, crack, cloud the beads, or damage the elastic.
| Glue Type | Use for Elastic Bracelets? | Notes |
|---|---|---|
| Flexible jewelry glue | Yes | Best option for many stretch bracelets |
| Hypo cement-style jewelry glue | Yes | Good precision tip for small knots |
| Super glue | Use with caution | Can dry brittle and weaken some elastic |
| Hot glue | No | Bulky, messy, and not durable |
| School glue | No | Not strong enough |
| Epoxy | Usually no | Too rigid for most stretch bracelets |
Use a tiny amount. More glue does not always mean more strength. Too much glue can create a hard lump that rubs, cracks, or looks unprofessional.
Common Mistakes That Make Stretch Bracelets Break
Avoid these common beginner mistakes.
Mistake 1: Using Cord That Is Too Thin
Thin cord may fit easily through beads, but it may not be strong enough. If your beads are heavy, use thicker cord.
Mistake 2: Skipping the Pre-Stretch
Elastic can relax after the bracelet is finished. Pre-stretching reduces sagging and helps the bracelet keep its shape.
Mistake 3: Making the Bracelet Too Tight
A tight bracelet puts constant pressure on the cord. Add enough ease so the bracelet sits comfortably.
Mistake 4: Using Sharp or Rough Beads
Gemstone, crystal, glass, and lava beads can have rough holes. These edges can slowly cut through elastic.
Mistake 5: Pulling the Bracelet On Like a Rubber Band
Stretch bracelets should be rolled over the hand, not pulled far away from the wrist. Include this instruction for customers.
Mistake 6: Using the Wrong Glue
Hard glue can crack or make the knot brittle. Use flexible jewelry glue when possible.
Mistake 7: Cutting the Cord Too Close
If you trim the cord before the glue is fully dry, the knot may slip. Let the glue cure first.
Mistake 8: Ignoring Bead Weight
Heavy gemstone beads need stronger elastic. A delicate cord may not support a large bracelet full of 10mm stone beads.
Care Instructions for Stretch Bead Bracelets
Even a well-made stretch bracelet needs proper care. If you sell DIY jewelry online, include care instructions with every order.
Copy-and-Paste Care Card Text
Stretch Bracelet Care Instructions
Thank you for your handmade bracelet. To help your stretch bead bracelet last longer, roll it gently on and off your wrist instead of pulling or stretching it. Avoid wearing it in water, while sleeping, while exercising, or while applying lotion, perfume, sunscreen, or cleaning products. Store your bracelet flat or in a jewelry pouch when not in use.
Tips for Selling Stretch Bead Bracelets in an Etsy Store
If you are making stretch bracelets for an Etsy store, durability is only one part of success. Your listings also need strong SEO, clear photos, accurate descriptions, and customer-friendly sizing.
Etsy Store Listing Tips
Use keywords naturally in your title, description, tags, and image alt text. Good keywords may include:
- Beaded bracelet
- Stretch bead bracelet
- Handmade bracelet
- Gemstone bracelet
- Custom bracelet
- Personalized bracelet
- Bracelet making
- DIY jewelry
- Crystal bead bracelet
- Clay bead bracelet
- Gift for her
- Stackable bracelet
- Etsy store jewelry
- Handmade beads bracelet
Product Title Example
Stretch Bead Bracelet, Handmade Gemstone Bracelet, Beaded Bracelet Gift, DIY Jewelry Style, Stackable Bracelet
Product Description Example
This handmade stretch bead bracelet is made with quality beads and durable elastic cord for a comfortable fit. Each bracelet is carefully strung, knotted, glued, and finished by hand. It is perfect for stacking, gifting, everyday wear, or adding a simple handmade touch to your jewelry collection.
Please choose your bracelet size from the dropdown menu. For the best fit, measure your wrist and add about 0.5 inch for comfort.
What to Include in Every Listing
| Listing Section | What to Include |
|---|---|
| Title | Main keyword, bead type, bracelet style, gift keyword |
| Photos | Wrist photo, flat lay, close-up, size chart, packaging |
| Description | Materials, size, fit, care, customization |
| Tags | Beads, bracelet making, DIY jewelry, gemstone bracelet, stretch bracelet |
| Variations | Size, bead color, charm option, metal finish |
| Policies | Processing time, returns, repairs, custom order rules |
Why Durability Helps Etsy SEO
Etsy and Google both reward products that create good buyer experiences. Strong bracelets can lead to better reviews, fewer complaints, repeat customers, and more favorites. While durability itself is not a keyword, it supports the signals that help a product perform better over time.
SEO Tips for a Bracelet Making Blog or Online Making Business
If you are writing blog posts or product pages about bracelet making, SEO matters. Use your main keywords naturally, but do not stuff them into every sentence. Google favors helpful, clear, original content that answers real search questions.
For this topic, important SEO terms include:
- beads
- bracelet making
- DIY jewelry
- online making
- Etsy store
- stretch bead bracelets
- elastic cord bracelet
- how to make beaded bracelets
- why do stretch bracelets break
- best elastic cord for bracelets
- handmade beaded bracelets
Where to Place SEO Keywords
| SEO Area | Example |
|---|---|
| Blog title | How to Make Stretch Bead Bracelets That Don’t Break |
| First paragraph | Mention beads, bracelet making, and DIY jewelry naturally |
| Headings | Use phrases like “Best Elastic Cord for Stretch Bead Bracelets” |
| Image alt text | “stretch bead bracelet made with gemstone beads” |
| Meta description | Include the main search term and benefit |
| URL slug | how-to-make-stretch-bead-bracelets-that-dont-break |
| FAQ section | Answer common Google search questions |
Suggested Image Alt Text
Use descriptive alt text for your blog images:
- “stretch bead bracelets made with gemstone beads and elastic cord”
- “bracelet making supplies for DIY jewelry beginners”
- “how to tie elastic cord for beaded bracelets”
- “handmade beads bracelet for Etsy store”
- “elastic cord size guide for stretch bracelets”
Quality Control Checklist for DIY Jewelry Sellers
Before listing or shipping a stretch bracelet, use this checklist.
| Quality Check | Yes/No |
|---|---|
| Beads are clean and free of cracks | |
| Bead holes are smooth | |
| Elastic cord matches bead weight | |
| Cord was pre-stretched | |
| Bracelet size is accurate | |
| Knot is secure | |
| Flexible glue was used | |
| Glue is fully dry | |
| Knot is hidden or neatly finished | |
| Bracelet rolls on comfortably | |
| No sharp edges touch the wrist | |
| Care instructions are included | |
| Listing includes sizing information | |
| Photos show the bracelet clearly |
This checklist is especially useful if you make batches of bracelets for craft fairs, wholesale orders, online making classes, or an Etsy store.
Troubleshooting: Why Did My Stretch Bracelet Break?
Use this quick troubleshooting guide to identify the problem.
| What Happened | Likely Cause | Fix |
|---|---|---|
| Bracelet snapped suddenly | Cord too thin or bead hole too sharp | Use thicker cord and inspect beads |
| Bracelet came untied | Knot was not secure | Use surgeon’s knot and jewelry glue |
| Bracelet stretched out | Cord was not pre-stretched or poor quality | Pre-stretch cord and use better elastic |
| Knot looks bulky | Cord too thick or too much glue | Use a large-hole bead to hide knot |
| Beads have gaps | Bracelet is too loose or cord stretched | Resize and pre-stretch elastic |
| Cord frays near one bead | Sharp bead hole | Remove that bead or smooth the hole |
| Bracelet feels too tight | Not enough ease | Add 0.5 to 0.75 inch to wrist size |
| Glue turned white | Wrong glue or too much glue | Use clear flexible jewelry glue |
Stretch Bracelet Design Ideas That Are Durable and Sellable
If you want to make stretch bracelets that are both strong and attractive, start with designs that are simple and balanced.
1. Classic Gemstone Bracelet
Use 8mm gemstone beads with 0.8mm elastic cord. Add one small metal spacer near the knot to help hide the finish. Popular gemstones include amethyst, rose quartz, tiger’s eye, jade, black onyx, and howlite.
2. Clay Bead Name Bracelet
Use colorful clay beads with letter beads and 0.5mm to 0.7mm elastic. This style is popular for kids, teens, friendship bracelets, and personalized Etsy store listings.
3. Minimalist Pearl Stretch Bracelet
Use small glass pearls or freshwater pearls with thin elastic that fits through the holes. Add gold or silver spacers for a polished DIY jewelry look.
4. Men’s Black Onyx Bracelet
Use 8mm or 10mm black onyx beads with 0.8mm or 1.0mm elastic cord. Keep the design simple and use a strong knot hidden inside a larger bead.
5. Stackable Bracelet Set
Create a set of three bracelets using coordinated beads. For example, combine one gemstone bracelet, one metal spacer bracelet, and one simple accent color bracelet. Stackable sets can increase the average order value in an Etsy store.
6. Birthstone Stretch Bracelet
Use birthstone-colored crystal or gemstone beads and offer all twelve months. Birthstone bracelets are giftable and useful for online making tutorials, blog content, and handmade jewelry shops.
7. Evil Eye or Protection-Inspired Bracelet
Use blue glass beads, black onyx, hematite, or tiger’s eye. Be careful with product wording. You can describe symbolism, but avoid making guarantees or medical claims.
How to Photograph Stretch Bead Bracelets for Online Sales
Good photos help customers understand your bracelet quality. Since shoppers cannot touch the bracelet online, your images must show the beads, color, size, finish, and style clearly.
Take photos that show:
- The bracelet on a wrist
- The bracelet lying flat
- A close-up of the beads
- A size comparison
- Available color options
- Packaging
- Bracelet stack ideas
- Charm or personalization details
Use natural light when possible. Avoid harsh shadows, blurry images, and distracting backgrounds. If you sell in an Etsy store, consistent photography helps your shop look more professional.
How to Price Stretch Bead Bracelets
Many DIY jewelry beginners underprice their work. Your price should include materials, labor, packaging, fees, and profit.
Simple Pricing Formula
Materials + Labor + Packaging + Fees + Profit = Retail Price
Example Pricing Table
| Cost Item | Example Cost |
|---|---|
| Beads | $3.50 |
| Elastic cord | $0.20 |
| Spacer beads | $0.75 |
| Packaging | $1.00 |
| Labor | $6.00 |
| Etsy/store fees | $2.00 |
| Profit | $6.00 |
| Suggested retail price | $19.45 |
You can round pricing to a clean number, such as $19.99 or $20.00, depending on your brand and market.
Higher-quality materials, personalized options, gift packaging, and strong product presentation can support better pricing.
FAQ: How to Make Stretch Bead Bracelets That Don’t Break
What is the best elastic cord for stretch bead bracelets?
The best elastic cord depends on your beads. For many stretch bead bracelets, 0.7mm or 0.8mm clear elastic cord works well. Use thinner cord for seed beads and thicker cord for large-hole or heavy beads.
Why do my stretch bead bracelets keep breaking?
Stretch bracelets usually break because the elastic cord is too thin, the bead holes are sharp, the bracelet is too tight, the knot is weak, or the bracelet is pulled too hard when worn.
What knot should I use for elastic bracelets?
A surgeon’s knot is one of the best knots for elastic bracelets. It is stronger than a simple overhand knot and works well with many bracelet making projects.
Should I glue the knot on a stretch bracelet?
Yes, a tiny drop of flexible jewelry glue can help secure the knot. Let the glue dry fully before trimming the cord or wearing the bracelet.
How tight should a stretch bracelet be?
A stretch bracelet should be comfortable, not tight. Measure the wrist and add about 0.5 inch for a comfortable fit. Add more ease for larger beads.
How do I stop elastic bracelets from stretching out?
Pre-stretch the elastic cord before stringing, use quality elastic, avoid making the bracelet too tight, and tell customers to roll the bracelet on and off instead of pulling it.
Can I sell stretch bead bracelets in an Etsy store?
Yes, stretch bead bracelets can sell well in an Etsy store when they are well-made, clearly photographed, accurately sized, and described with strong SEO keywords like beads, bracelet making, DIY jewelry, gemstone bracelet, and handmade bracelet.
What beads are best for durable stretch bracelets?
Acrylic, wood, clay, gemstone, and smooth glass beads can all work well. The most important factor is that the bead holes are smooth and the beads are not too heavy for the elastic cord.
Can I use fishing line for stretch bead bracelets?
No, fishing line is not elastic. Use elastic cord for stretch bracelets. Fishing line or beading wire is better for clasp bracelets.
How long should a stretch bead bracelet last?
A well-made stretch bracelet can last a long time with gentle care, but elastic naturally weakens over time. Water, perfume, lotion, sweat, sunlight, and aggressive stretching can shorten its lifespan.
Conclusion: Better Materials Make Better Stretch Bead Bracelets
Learning how to make stretch bead bracelets that don’t break is one of the most useful skills in bracelet making. The process is simple, but the details matter. Strong DIY jewelry starts with quality beads, the right elastic cord, smooth bead holes, accurate sizing, secure knots, flexible glue, and clear care instructions.
If you are making bracelets for yourself, these steps will help your jewelry last longer. If you are selling through an Etsy store or another online making platform, they can help you create better products, stronger listings, happier customers, and more professional handmade jewelry.
Start with beginner-friendly materials, such as 6mm or 8mm beads and 0.7mm or 0.8mm elastic cord. Pre-stretch your cord, check every bead, tie a secure surgeon’s knot, add a tiny amount of flexible jewelry glue, and let the bracelet cure before wearing or shipping.
Stretch bead bracelets may be simple, but they can still be high-quality. When you treat every part of the bracelet as important, from the beads to the knot, your finished DIY jewelry will look better, feel better, and last longer.